Saturday, October 22, 2011

Fall = Stew

It feels so good to be back blogging again!
The past week has been a little crazy. We're getting ready for things which I can't go
into a lot of detail about (I'm a military wife though, so you could probably guess from that.).
There is a lot of stuff we have needed to get done,
and a lot of time we needed to spend as a family.
I have managed to still be crafting though, even involving my husband and kids along the way.

These next posts are going to be the last ones for the
Crafting Over Sweeting Challenge.
It's a little bittersweet and I can't believe the 21 days are over,
but more on that later.

This post's featured craft is:
Yummy Creamy Beef Stew

picture & recipe inspiration courtesy of Italian cooking goddess, Giada de Laurentiis.
** I couldn't even snap a picture of mine, the family had it gobbled up before I could!
So, imagine this picture with lovely, creamy sauce.**

I consider cooking a craft. To me, it's just another way to get your creative juices flowing.
When I stumbled upon this Beef Stew recipe by Miss Laurentiis I knew I had to try it.
Her recipes are fantastic and oh so flavorful. When I started cooking it though, the creative juices started to flow. The end result was a combination of lack of ingredients, preferred taste, and things I just needed to use, that resulted in something utterly delicious.

Pair this stew with these, I you got your self one heck of a dinner!

**The ingredients/instructions in BLACK are from the original recipe,
the ingredients/instructions in TURQUOISE are my own add-ins or substitutes.**

For this craft you will need:
  • 3 tablespoon olive oil
  • 1 onion, peeled and chopped
  • 2 cloves of garlic, minced
  • 1 teaspoon dried rosemary
  • 1 teaspoon dried thyme
  • 2 pounds stew beef, cut into 2-inch cubes
  • 1/2 teaspoon salt, plus more to taste
  • 1/2 teaspoon freshly ground black pepper, plus more to taste
  • 2 Tablespoons all-purpose flour
  • 1 can of French Onion soup
  • 2-3 cups of butternut squash, trimmed and cut into 2-inch cubes
  • 4 carrots, peeled and chopped
  • 3 potatoes, peeled and chopped
  • 2 cans of beef broth
  • 1 cup heavy cream
  • 1 Tablespoon cornstarch

Directions:

In a large soup pot heat 3 tablespoons of olive oil medium heat.

Add the onions, garlic, rosemary, and thyme and saute until the onions are tender, about 2 minutes.

Toss the beef cubes in salt and pepper and flour.

Turn up the heat to med-high and add the beef to the pot. Cook until the beef is browned and golden around the edges, about 5 minutes.

Add the can of French Onion soup. Using a wooden spoon, gently stir up all the brown bits off the bottom of the pan.

Add the butternut squash, carrots, and potatoes. Stir to combine.

Add enough beef broth to just cover the beef and squash. Bring the stew to a boil over high heat, then reduce the heat to low and simmer, covered, for 1 hour.

After the stew has simmered, combine the heavy cream and cornstarch in a separate bowl. Make sure there are no lumps left.

Add the cream and cornstarch mixture to the stew and heat until thick, bubbly and delicious.

Mmmm... so perfect for a cold day.

Happy Crafting!



Thursday, October 20, 2011

Sometimes you need a breather.

Hey all! This is the final week of the
Crafting Over Sweeting Challenge!
I can't believe that I only have 3 more days... CRAZY!

I'm so excited because we have family in town for a couple of days.
This of course does not mean I'm not keeping up with the crafting
(I have pictures to prove it! :D),
it just means that I won't get to blog about all of them until Friday & Saturday.

I am going to be featuring 4 more crafts by the end of the week.

-Melted crayon art
*So awesome! If you haven't seen this yet just type it into to Pinterest
or even Google and check it out. Once I saw it I knew I NEEDED to try it out.*

-Surfboard height tracker
*For my kid's (soon to be) beach-themed room.*

-Floral Monogram

*I needed to use the flowers from the wreath I took apart
and this worked out perfectly!*

-Yummy Creamy Beef Stew
*just as an added bonus, and because it's a-mazingly delicious.*

Happy Crafting!


Tuesday, October 18, 2011

Day 16: Felt... I love it.

Welcome to Day 16 of the
Crafting Over Sweeting Challenge.

Sweets eaten: Nada.
I even made s'mores (my FAVORITE sweet) for our family dessert last night and didn't eat any.
Can I get a "Woo-Hoo!"?

Sweets craved: S'mores... obviously :D.

Today's featured craft is:

These are so simple, so cute and so versatile.
In this tutorial I use them in clips, but there are so many awesome ways you could use them. One of my future projects will be to do these in red and white for a Christmas garland....
so excited!

For this craft you will need:


1 sheet of felt

Buttons

*any that suit your fancy*

Embroidery thread & needle

Hair clips

*any hair supply store will carry these.
You will also need ribbon if you want to cover them.
Here is an excellent tutorial on how to do that.*

Scissors

Rotary cutter, quilting ruler, and rotary cutting mat

*or a ruler and scissors, the above items just make it a little easier*

Glue Gun

Start by cutting a 3"x 3" square


Keep cutting squares, decreasing their size by 1/4"
(3" square, 2 3/4" square, 2 1/2" square, etc.)

Your last square will measure 1" and
this is what your finished pile of felt squares will look like...


Now you're going to shape your squares into flowers.

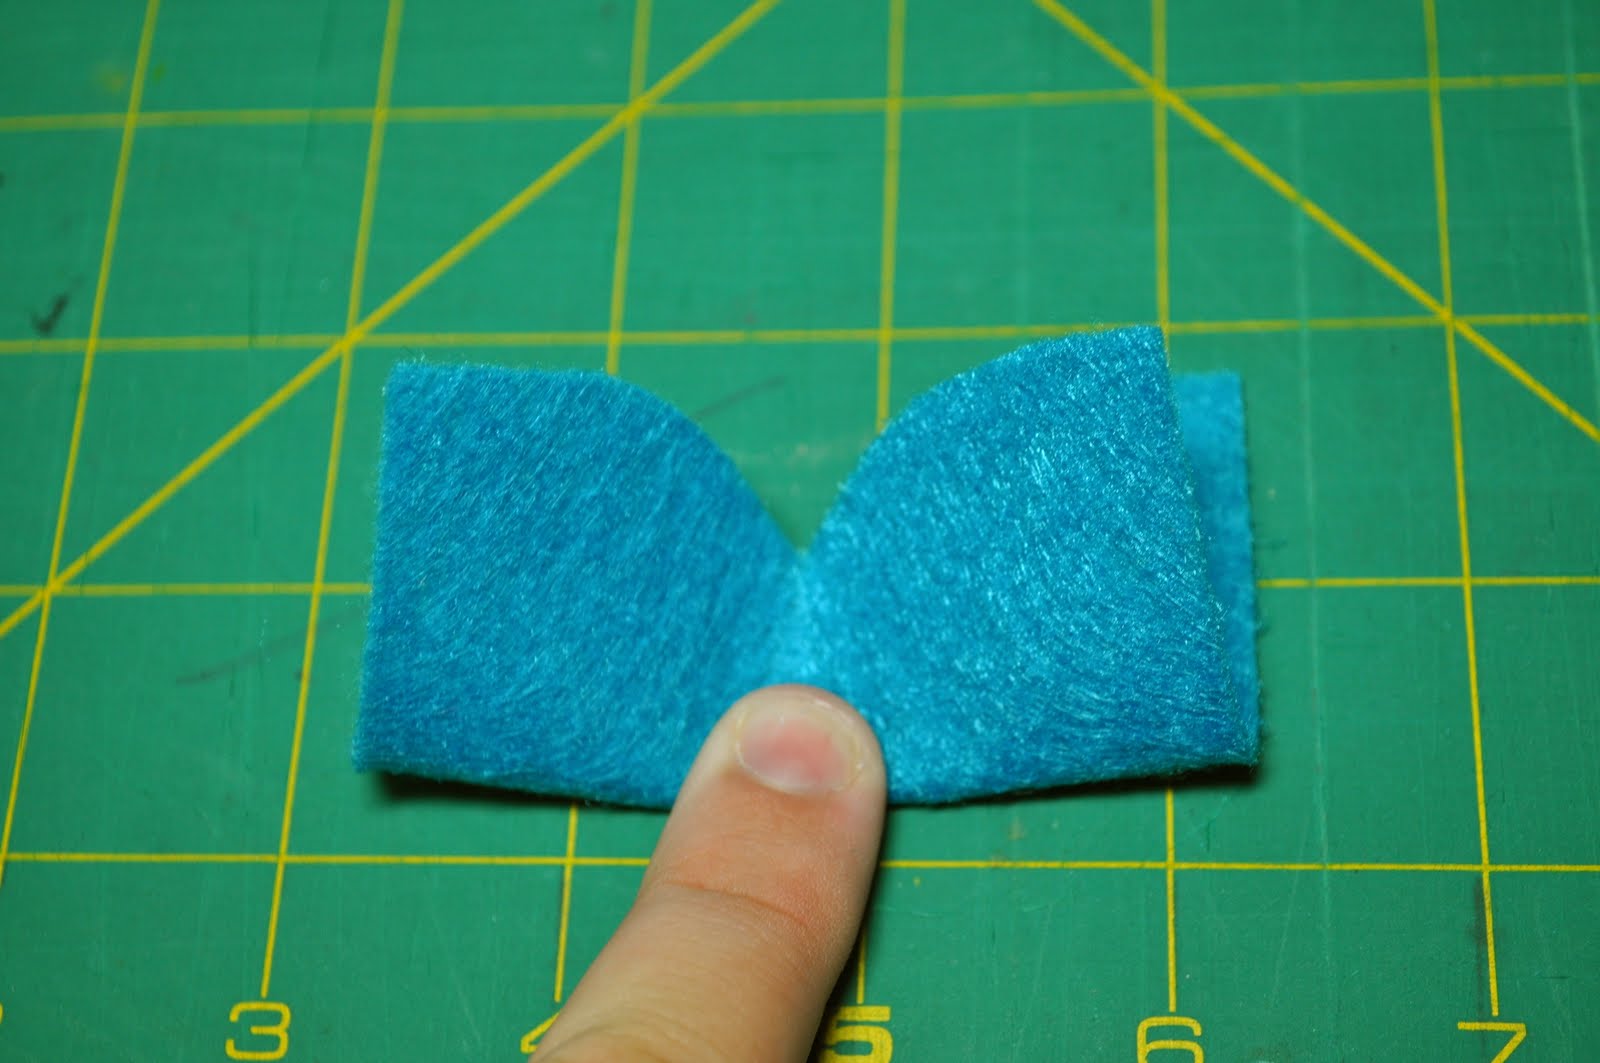
Take a square and fold it in half.


Cut the folded edge so it's curved, like so...


Then do the other side.


Unfold, then fold so the cut sides are together.


Cut the two edges like you did before.


and Voila!


Repeat these steps with the remaining squares
and you get a lot of scraps,


and a beautiful flower.


Sew together the flowers in the middle
and attach your button of choice.


Tie your embroidery thread in a knot on the back of your flower.


Hot glue your clip to the back of your flower.
**Update: At this point in the post I did a "Helpful Tip", that was more me
voicing my frustration than an actual tip. My issue was that the ribbon covered clips
always seemed to slip out of (my) hair more than the the non-covered clips did.
Thanks to a comment from Kayla, I now know how to avoid this.
Check out Kayla's awesome comment below
to see how to keep your ribbon covered clips from slipping.**


So pretty!


Here's a second, smaller one I made with a ribbon covered hair clip.


These are so much fun, and like I said you can do so many things with them.
Get creative, and like always
Happy Crafting!

Linked up to:
Blue Cricket Designs
Lil' Luna
Sew Much Ado
Sweet Little Gals
Fabric Bows and More
seventhirtythree

Monday, October 17, 2011

Day 14 & 15: I SEE YOU...

It's nice to be posting about the
CRAFTING OVER SWEETING CHALLENGE again.

I've still been crafting, but like I said in a previous post we spent this weekend as a family...
in my mind that meant no blogging.

S
weeting Update:
Sweets eaten: I'll admit, I had a couple sips of soda this weekend.
The amazing thing was, just a couple of sips made me completely sick to my stomach.
I guess my body is getting used to no sweets. I know it was a misstep, but at the same time
it just made me realize that this Challenge is totally worth it!

I am so excited about today's featured craft!
It has actually taken me a couple of days to complete, which is why I combined days 14 and 15.

Today's featured craft is the:
"I SEE YOU" Yarn & Tulle Wreath

Tulle wreaths seem to be the popular holiday decor for this Halloween,
so of course I had to make one :).

For this craft you will need:
1 wreath

Yarn

*I used white*

Strips of tulle
*Use any color you like, get creative!
Mine measured about 3"x 20"*

Googly Eyes

Spa
rkly letters
*I got mine from Wal-mart... have you noticed I get most everything from there?*

Trusty glue gun

If needed, remove any flowers or decorations from wreath
*This one is gorgeous, but it is also old, worn and balding.
It was crying out to be revamped*


There we go... fresh start!


Wrap your yarn around your wreath,
leaving 3 inch spaces for the tulle.


Simply tie the tulle in a knot around the wreath


Line the knots on the edge of the wreath like so...


Trim tulle to whatever length you prefer


Almost done!


Play around and figure out where you want your
eyes and words to go, then glue them on.


and there you go!


I absolutely LOVE this wreath!!
I know I may seem like a wreath fanatic at times (and I may be)
but this is just perfect for Halloween.
Not to mention it is a-mazingly easy to make, which is always a plus.

Happy Crafting!!

Linked up to:
Sumo's Sweet Stuff
Mommy by day, Crafter by night
Sugar Bee Crafts
Today's Creative blog
Someday Crafts
Skip to My Lou
Hope Studios
Tip Junkie
Roca and Company
Sew Woodsy

And we have a winner!

Friday was the
HALFWAY THERE GIVEAWAY!
It was so exciting to see such a response from all of you.
I wish I could give something to everyone, but as you know there can only be one winner.

I know normally this is where a comment randomizer would be used,
but I decided to go with the original randomizer...

Yep, a cute little mason jar and strips of paper :D


All folded up...


Give it a good couple of shakes...


And the winner is...


LINDSAY!

Lindsay had this to say about Halloween crafting:

Decorating Pumpkins is a craft I love to do every year, and your cupcake paper painting on the pumpkins was awesome!
But, I think this year I have my eyes on making a Halloween garland like you made!

Thank you Lindsay! I'll be in contact with you shortly so I can get you your prize.

Thank you to everyone for entering! This is the last week for the
CRAFTING OVER SWEETING CHALLENGE
and I would like to do at least one more giveaway before it's done so keep checking back here.
As always,
HAPPY CRAFTING!


Sunday, October 16, 2011

Family Time Out

This weekend we took some much needed family time.

We went to into Seattle and took the kids to the aquarium. The kids absolutely loved it.

We also took the ferry into Seattle. My oldest boy calls it the "boat", and was thrilled that we not only rode it once but TWICE.

We also went on a ward trip to here. It was a-mazing!


So, I hope you can forgive me for not blogging.

Tomorrow I will be featuring a delicous beef stew (I totally count cooking as a form of crafting :D) and an awesome yarn and tulle wreath.


I will also be announcing the winner of this tommorow.

(Are you just so excited?? I am!)


Stay tuned, and keep being crafty!


Friday, October 14, 2011

Day 13: Glow-Stick Lanterns

Here's to Day 13 of the
Crafting Over Sweeting Challenge!

Sweets eaten: Zip.
I've noticed I'm not having so many cravings anymore, and at least the dreams about tables full of baked goods have stopped :).

Sweets craved: These... I love Pinterest!


The Day 12 featured craft is:

Glow Stick Lanterns

As I said above, I absolutely love Pinterest. I have never gone on there and NOT found something absolutely adorable and completely awesome. It is where I found today's craft project. Now I'm not sure where exactly these originated, but the picture I found on Pinterest came from Lil Blue Boo (find her awesome site HERE.).

For this craft you will need:

glow sticks & mason jars

That's it
!

Use scissors ( or a box cutter, which is what I had on hand) to cut off the ends of your chosen glow sticks.

Empty contents in your mason jar.
**Helpful Hint: Lil Blue Boo suggests adding a little water to help the glow last longer.)

Screw on the lid, give it a shake and...

So cool!
!!

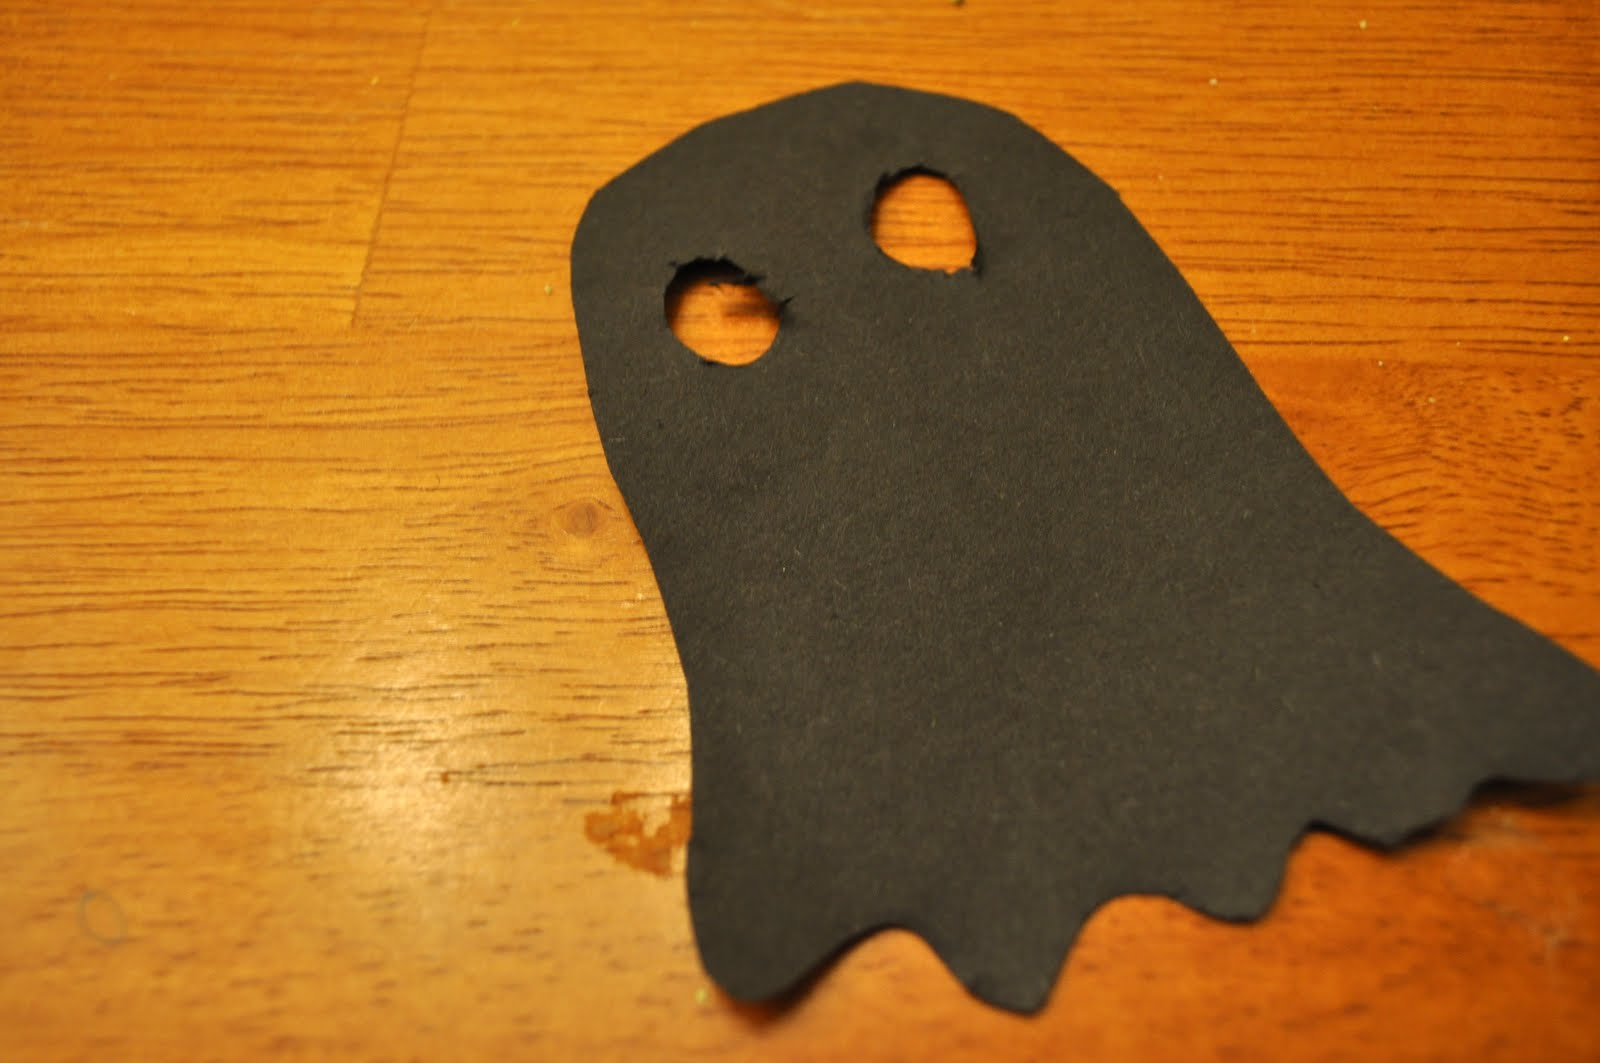
Now I added a little ghost silhouette to cut from construction paper.


Just glue it to the front and you get this...


Spooky.

I just love these! They are so much fun,
and will definitely be lining my porch on Halloween night.

Happy Crafting!!!